In this article we are going to cover How to Build Java Project using Maven in Jenkins, Install GitHub and Maven Integration Plugins in Jenkins, Global Tool configuration in Jenkins, Create Maven Project in Jenkins, Enter Project Details in Jenkins and Build maven project in Jenkins.
Table of Contents
Prerequisites
- Installed Jenkins with login credentials
How to Build Java Project using Maven in Jenkins
#1: Login to Jenkins
First thing, we will login to our Jenkins account with username and password.

#2: Install GitHub and Maven Integration Plugins in Jenkins
To build Java project with maven we need to install some plugins like,
- GitHub Integration Plugin
- Maven Integration Plugin
To install plugins follow below steps
Navigate to Dashboard->> Manage Jenkins ->> Manage Plugin
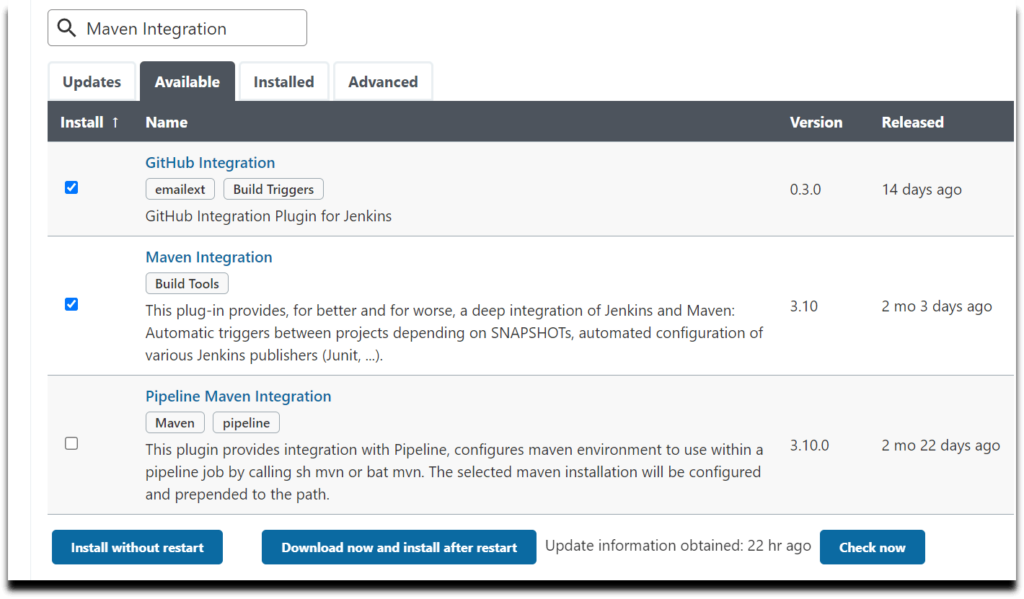
Now search for “GitHub Integration Plugin” and click on Download now and install after restart.

We will do the same for “Maven Integration Plugin” and click on Download now and install after restart.
As we can see plugins are downloaded successfully. So now click on Restart Jenkins checkbox.
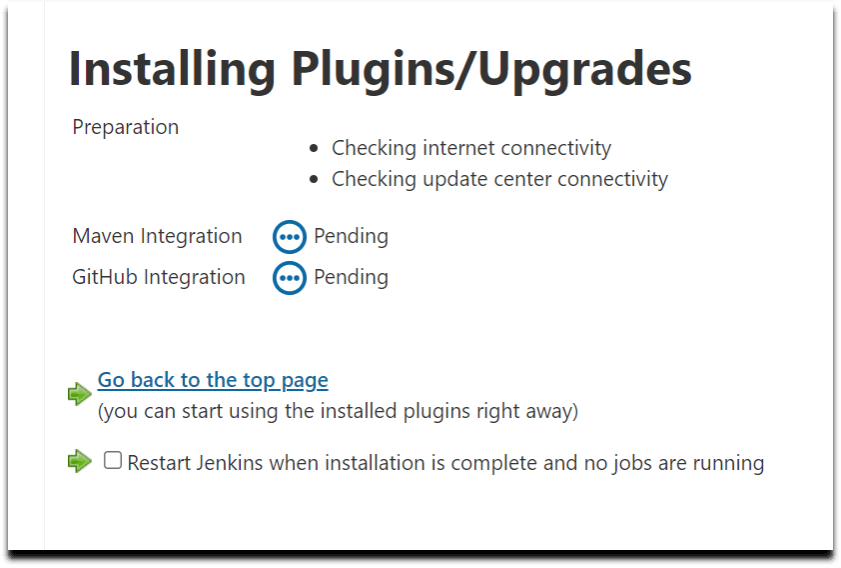
Please wait while Jenkins is restarting

#3: Global Tool configuration in Jenkins
Now we will configure System by adding JDK and Maven installation in Jenkins.
Navigate to Dashboard->> Manage Jenkins->> Global tool Configuration

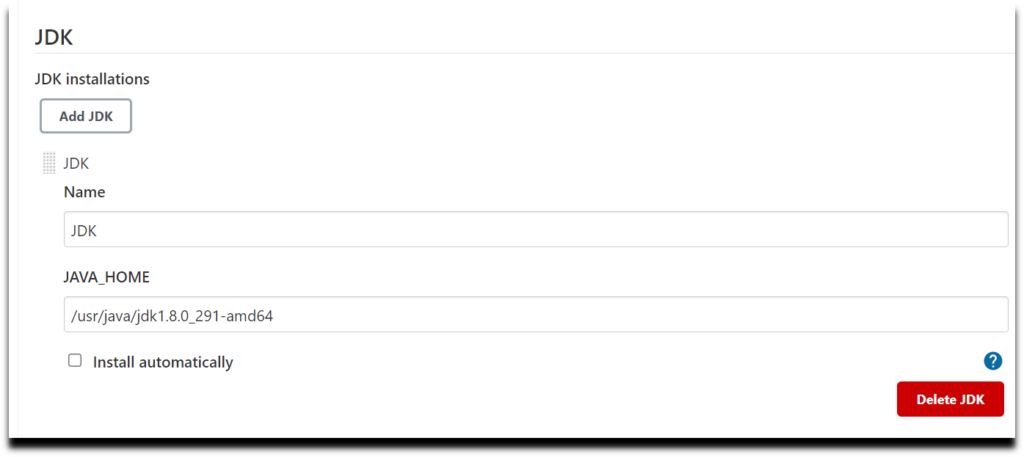
Click on JDK->> Add JDK, Give a JDK name and provide your JAVA_HOME path where the JDK is present.
Now below click on Maven->> Add Maven, We can provide our Installed Maven path or we can also use Jenkins default one.In this case we are using Jenkins default Maven version.
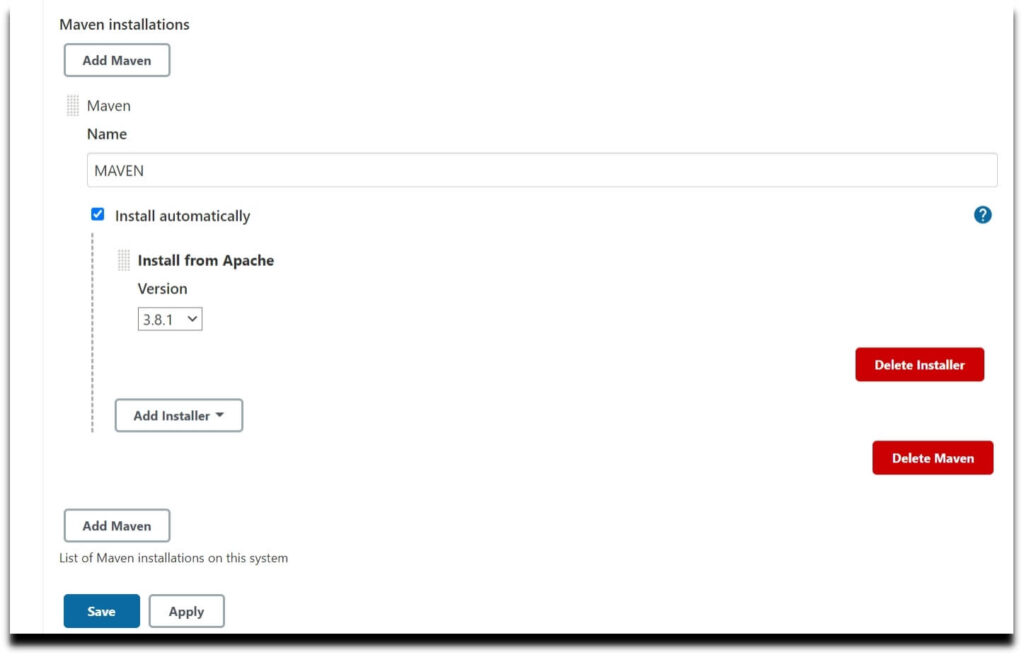
Click on apply and save.
#4: Create Maven Project in Jenkins
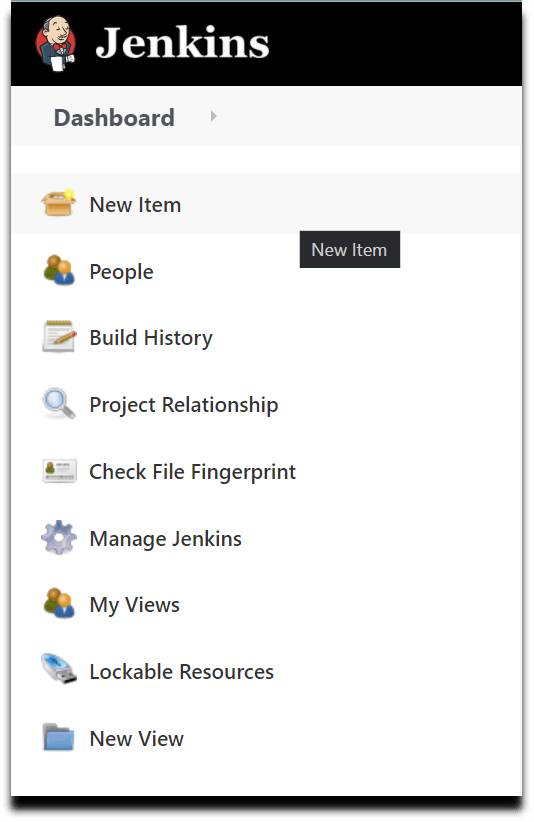
Now we will create a new Job (maven project) in Jenkins, So, click on “New Item” on the Jenkins Dashboard.
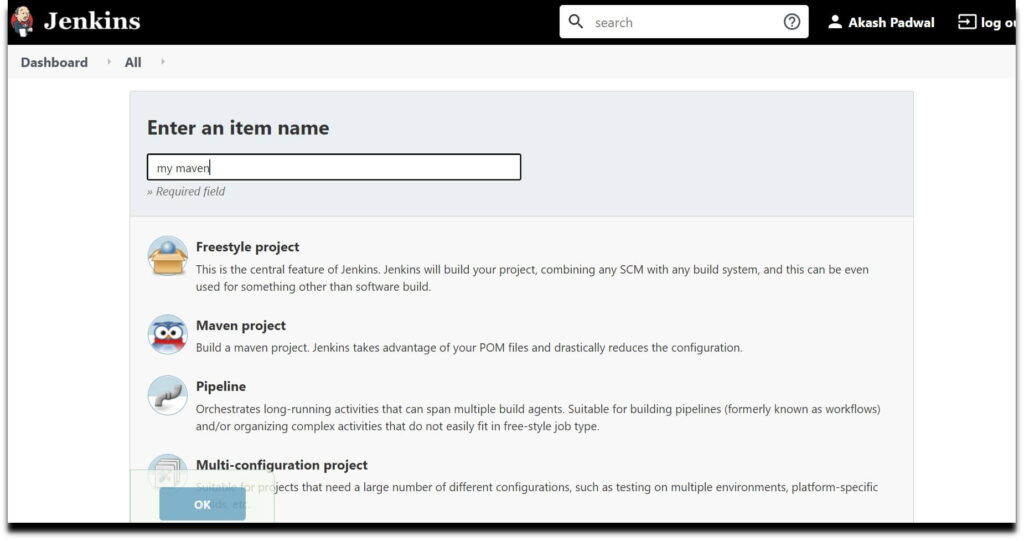
Enter Job name and select “Maven Project” and Click OK.
#5: Enter Project Details in Jenkins (source code management).
Give some description for your Project., Now In Source Code Management provide your Git Repository URL or you can use our GitHub Repository for testing.

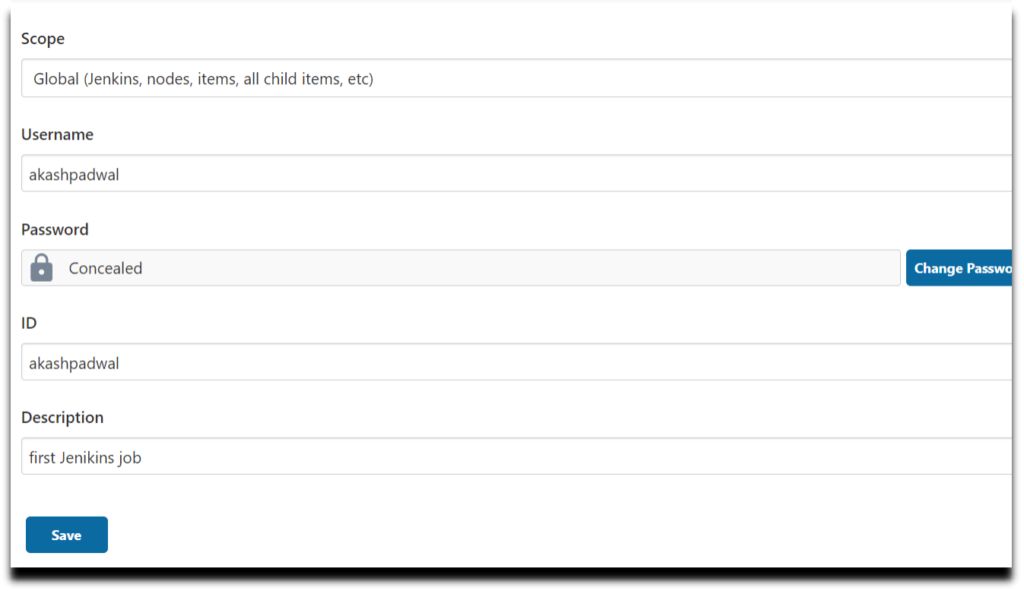
As you can see, we got an error but no need to worry, As our repository is private so we will need to “Add credentials”.So click on add button, Now select Global as a scope, Provide your GitHub username and password, Provide your GitHub ID, Enter a description for your credentials, Now click on SAVE button.
#6: Set Branch and Build Triggers in Jenkins
Provide your particular github branch.

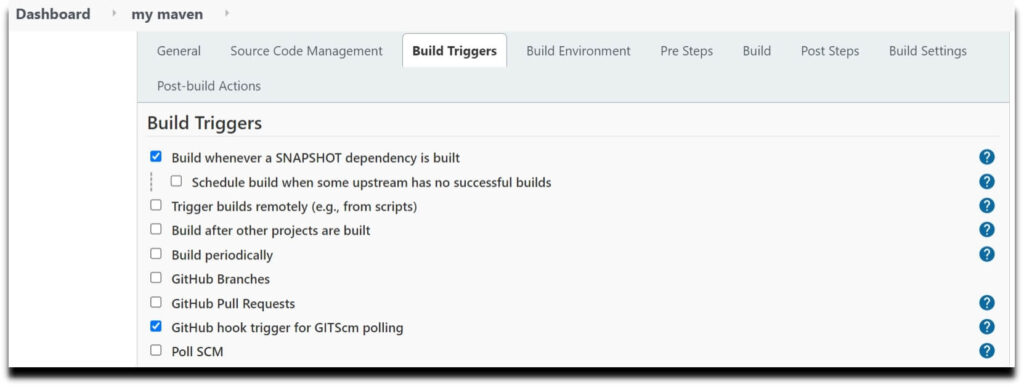
Select Build whenever a SNAPSHOT and GitHub hook trigger for GITScm polling as triggers.
Now in Build Environment section we have to select “Delete workspace before build starts”.
#7: Provide POM file for Maven Project in Jenkins
Now the most important part of our build is POM file, So in build section provide path of your projects pom file, Set clean and package as Goals and options.

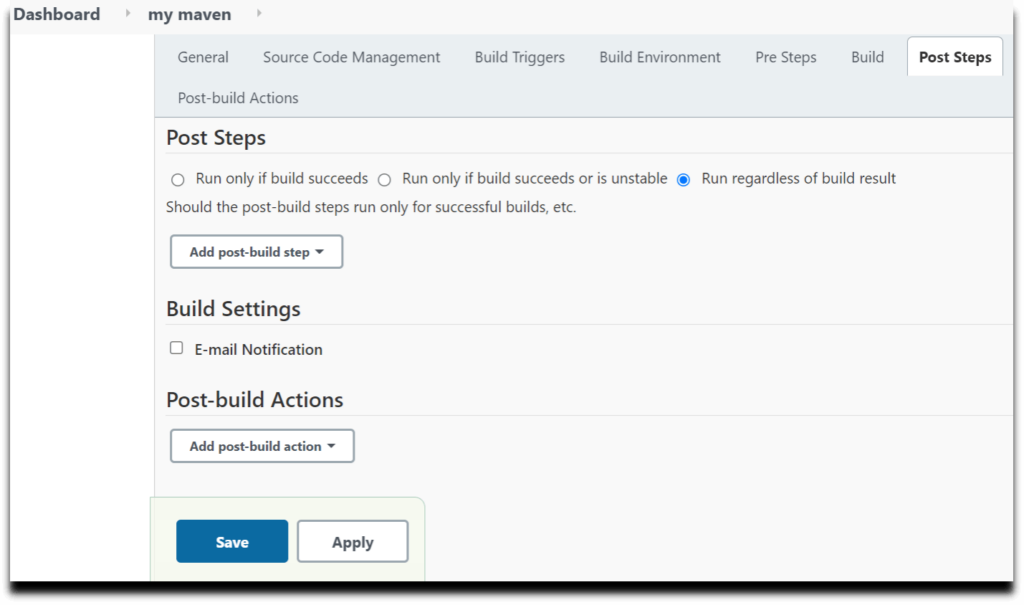
Set Run regardless of built result, Then click on Save and Apply.
#8: Build maven project and check Console Output
Now go to Jenkins Dashboard and we can see our Maven project has been integrated with Jenkins.
Click on Build now.

Now below we can see the build history and click on the latest build.
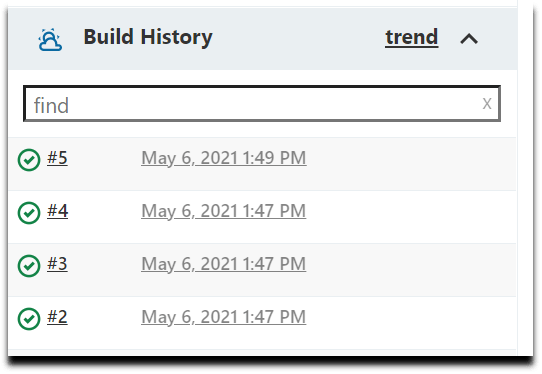
Now you can see the latest build with date and time, So click on Console Output.

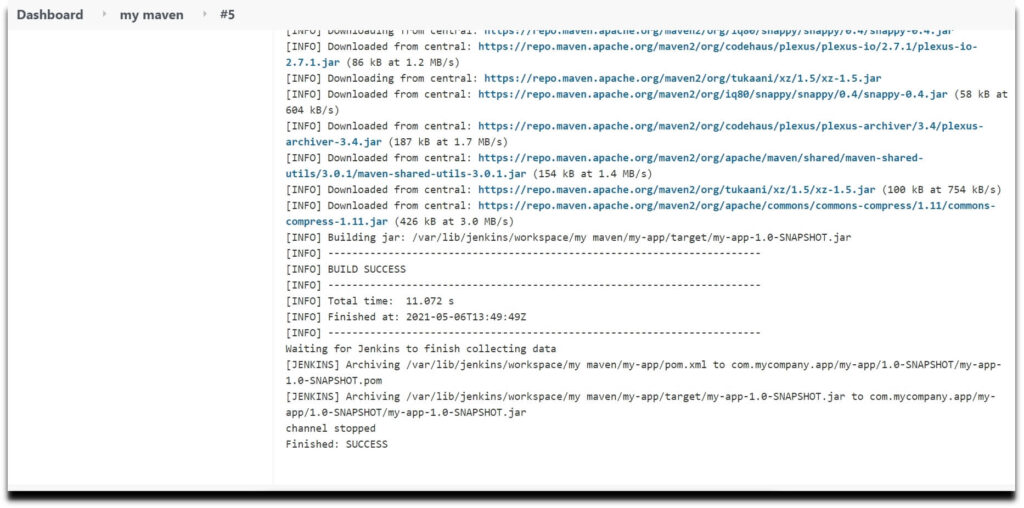
As we can see our Maven Project is Build successfully on Jenkins, we have covered how to Build Java Project using Maven in Jenkins using a GitHub(private repository)
Conclusion:
In this article we have covered how to Build Java Project using Maven in Jenkins using a GitHub(private repository), We studied how to add plugins (Git and Maven), How to configure JDK and Maven in Jenkins, We learned how add Git repository URL and how to add POM file in Jenkins, how to add Build Triggers.
We learned how to add credentials so that Jenkins can gain access to our private / public repository, build a Java Project using Maven in Jenkins.
Related Articles:
